> ## Documentation Index
> Fetch the complete documentation index at: https://docs.lithoblocks.com/llms.txt
> Use this file to discover all available pages before exploring further.

# Quickstart

> Create your first Slack message template with dynamic data and send it to your workspace in 5 minutes.

Learn how to create a simple Slack message template with dynamic data and send it to your workspace.

## Watch the demo

<div style={{ position: 'relative', paddingBottom: 'calc(83.1942% + 41px)', height: 0, width: '100%' }}>
  <iframe src="https://demo.arcade.software/j0e8vt6lf6b61hroViZg?embed&embed_mobile=inline&embed_desktop=inline&show_copy_link=true" title="Create and send a personalized Slack welcome message template" frameBorder="0" loading="lazy" allowFullScreen allow="clipboard-write" style={{ position: 'absolute', top: 0, left: 0, width: '100%', height: '100%', colorScheme: 'light' }} />
</div>

## Prerequisites

* Slack workspace connected (see [Connecting Slack](/connecting-slack))
* Basic understanding of JSON data structures

## Step 1: Create a new template

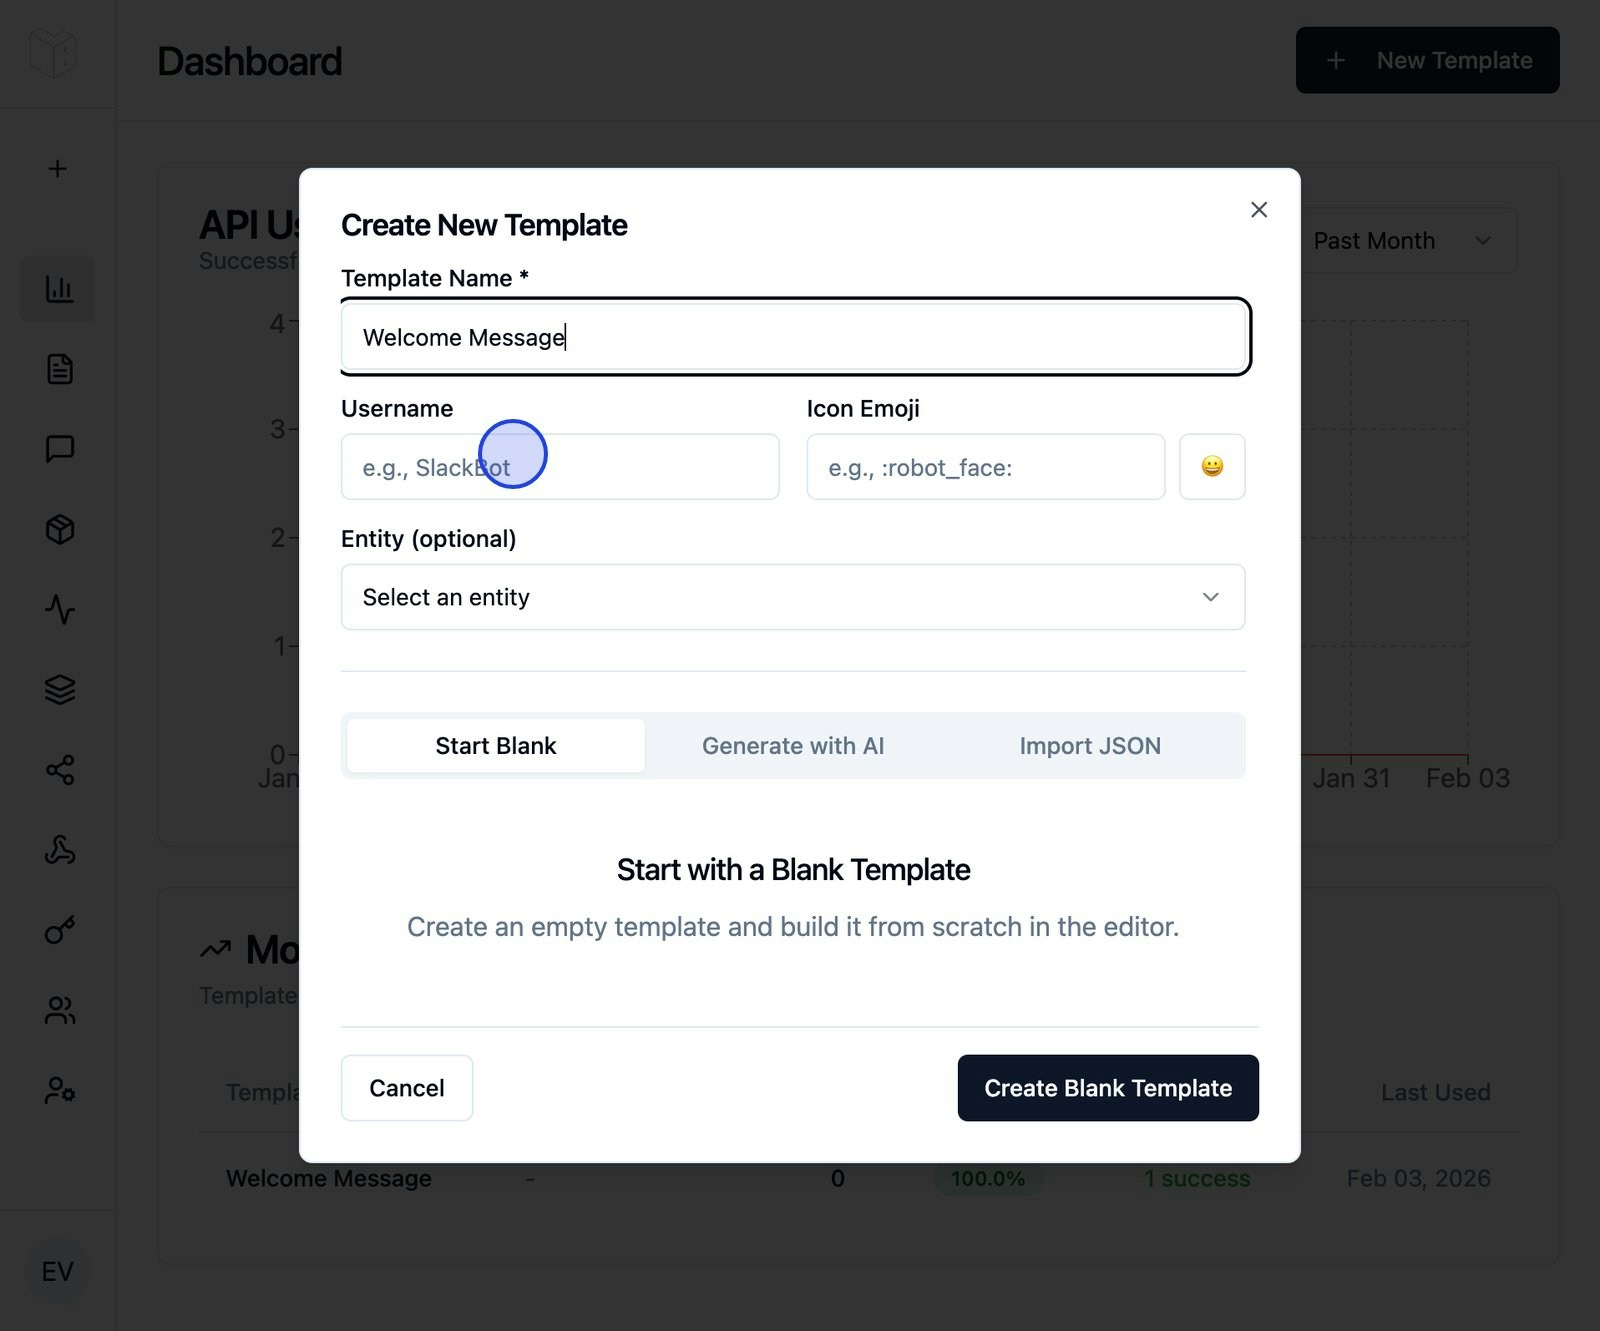
1. Navigate to **Templates** in the sidebar
2. Click **Create Template**
3. Enter a name: `Welcome Message`
4. Click **Create**

<img src="https://mintcdn.com/lithoblocks/KGZFBT_KPY8H2VP2/images/quickstart-template-create.png?fit=max&auto=format&n=KGZFBT_KPY8H2VP2&q=85&s=b8067a20c2d6d855104fca7c5364b5da" alt="Template creation dialog" width="1600" height="1331" data-path="images/quickstart-template-create.png" />

You'll be taken to the Template Builder.

## Step 2: Add your first block

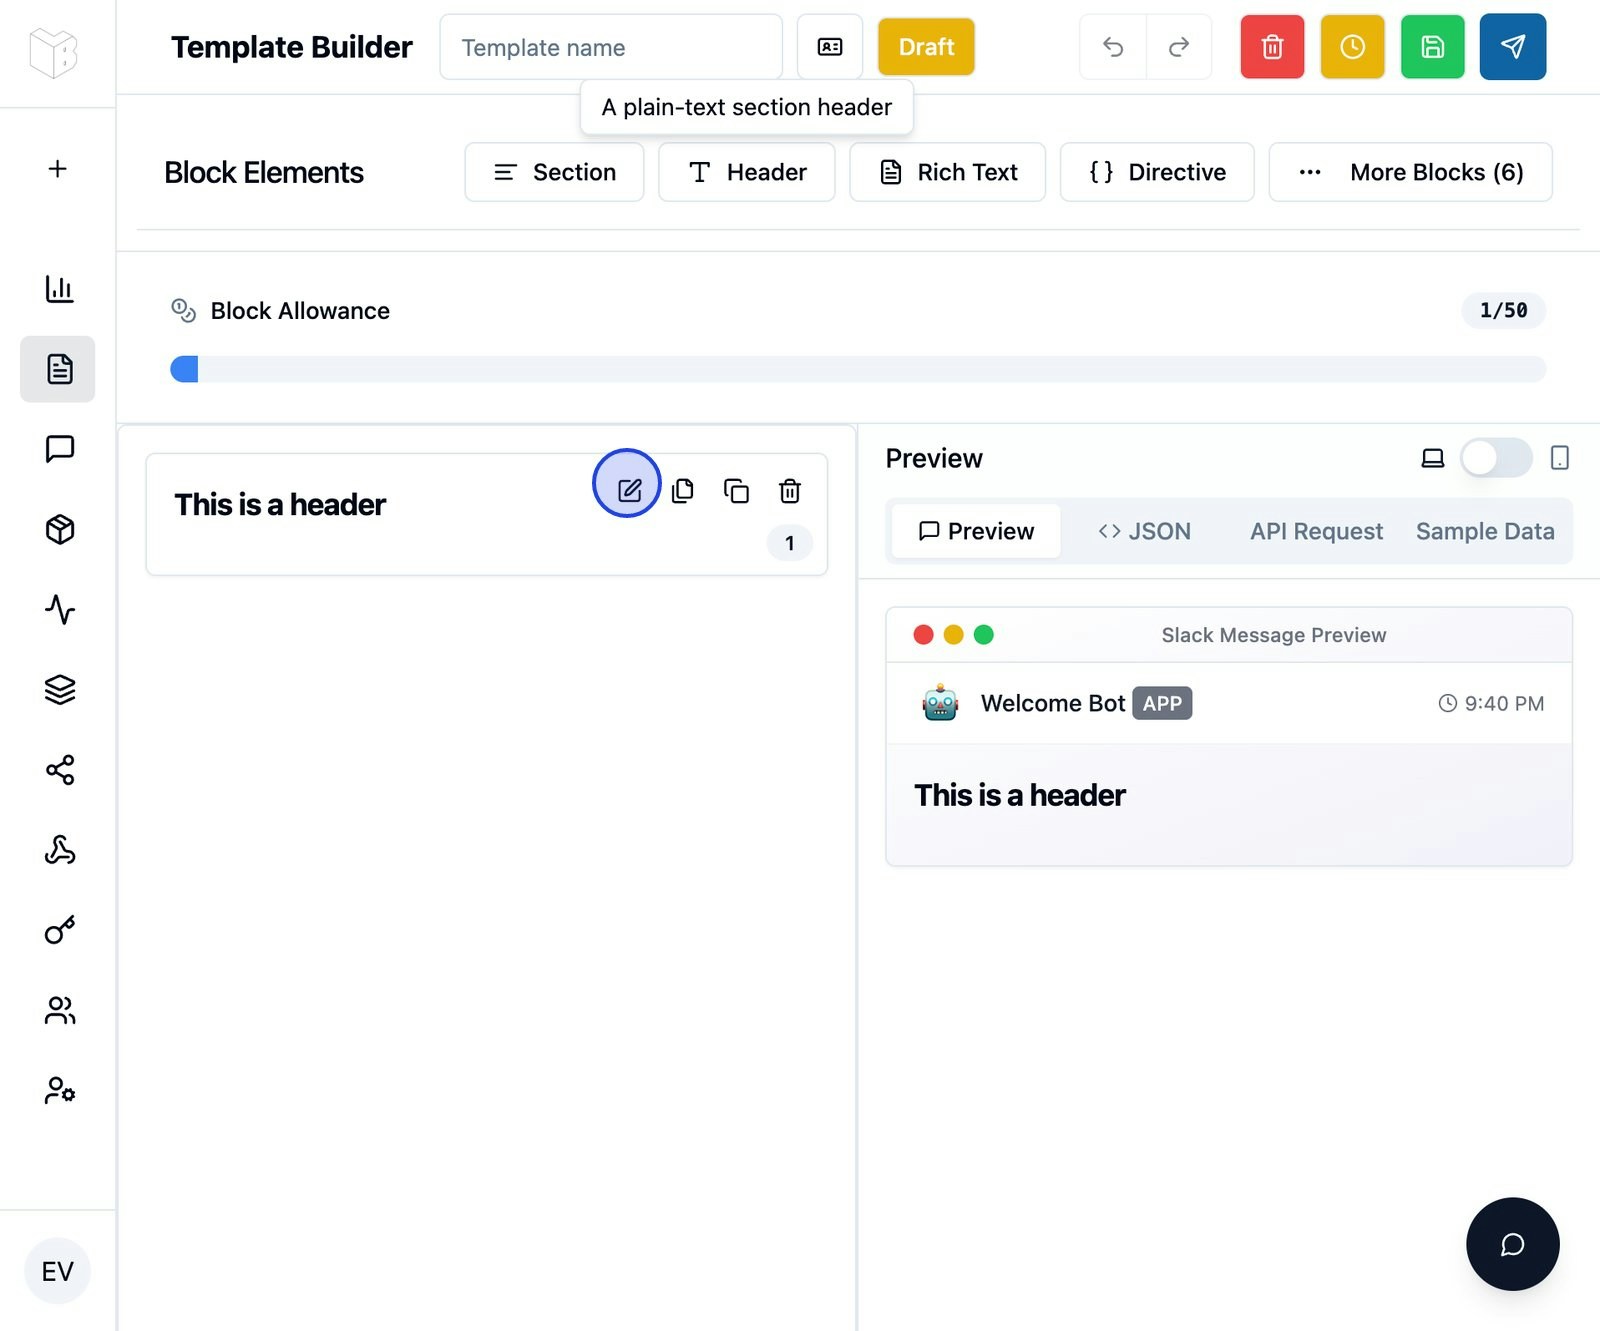
1. In the **Block Toolbox** above the canvas, find the **Header** block
2. Click it to add it to your template
3. In the text field, type: `Welcome to the Team!`
<img src="https://mintcdn.com/lithoblocks/KGZFBT_KPY8H2VP2/images/quickstart-header-block.png?fit=max&auto=format&n=KGZFBT_KPY8H2VP2&q=85&s=0b5b5bf5d9e7b9179b5a18c929ea850f" alt="Header block added" width="1600" height="1331" data-path="images/quickstart-header-block.png" />

## Step 3: Add dynamic content with placeholders

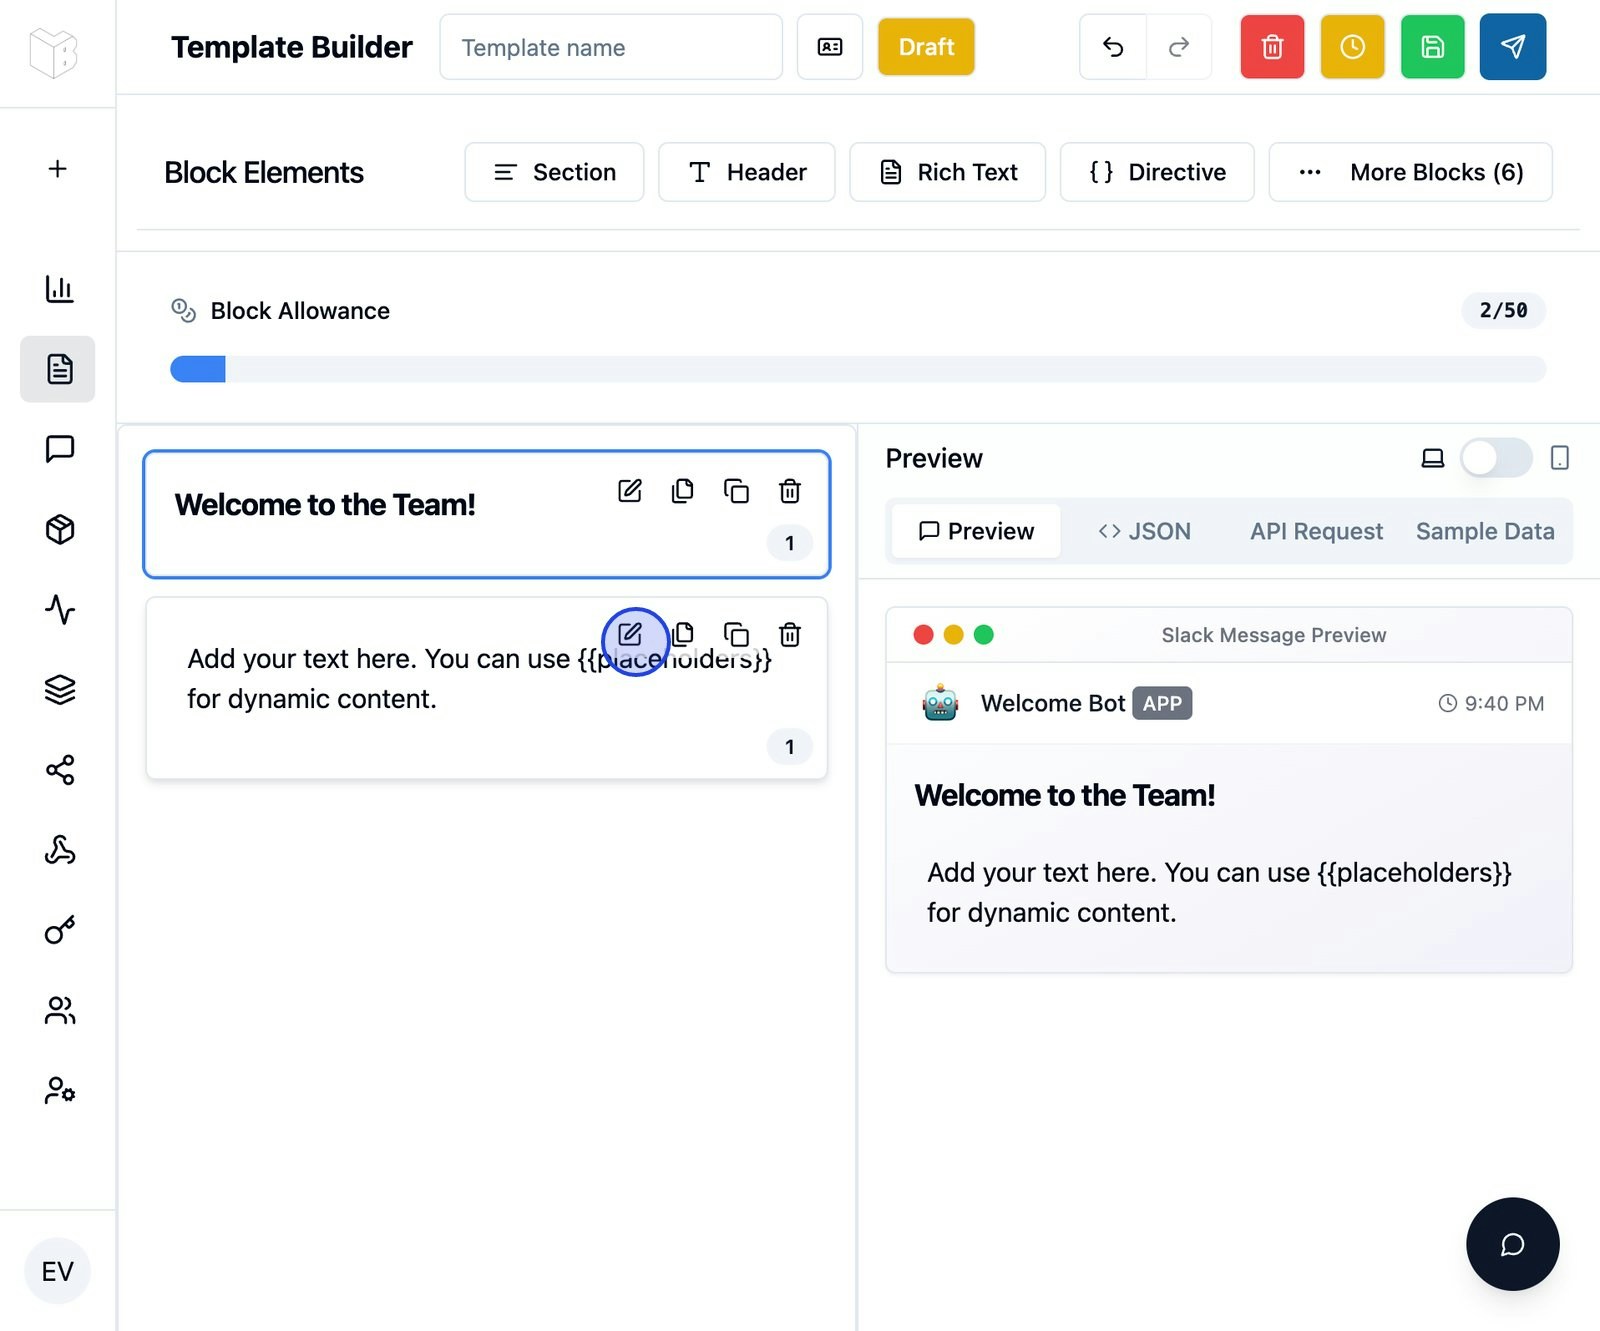
1. Click **Section** in the Block Toolbox
2. In the text area, type:

```
Hi {{user.name}}, welcome aboard! We're excited to have you join us as a {{user.role}}.
```

The `{{user.name}}` and `{{user.role}}` are **placeholders** — they're replaced with actual data when you send the message.
<img src="https://mintcdn.com/lithoblocks/KGZFBT_KPY8H2VP2/images/quickstart-section-placeholders.png?fit=max&auto=format&n=KGZFBT_KPY8H2VP2&q=85&s=6e3d14dfcf116cb1de90551a29216027" alt="Section block with placeholders" width="1600" height="1331" data-path="images/quickstart-section-placeholders.png" />

## Step 4: Add sample data for preview

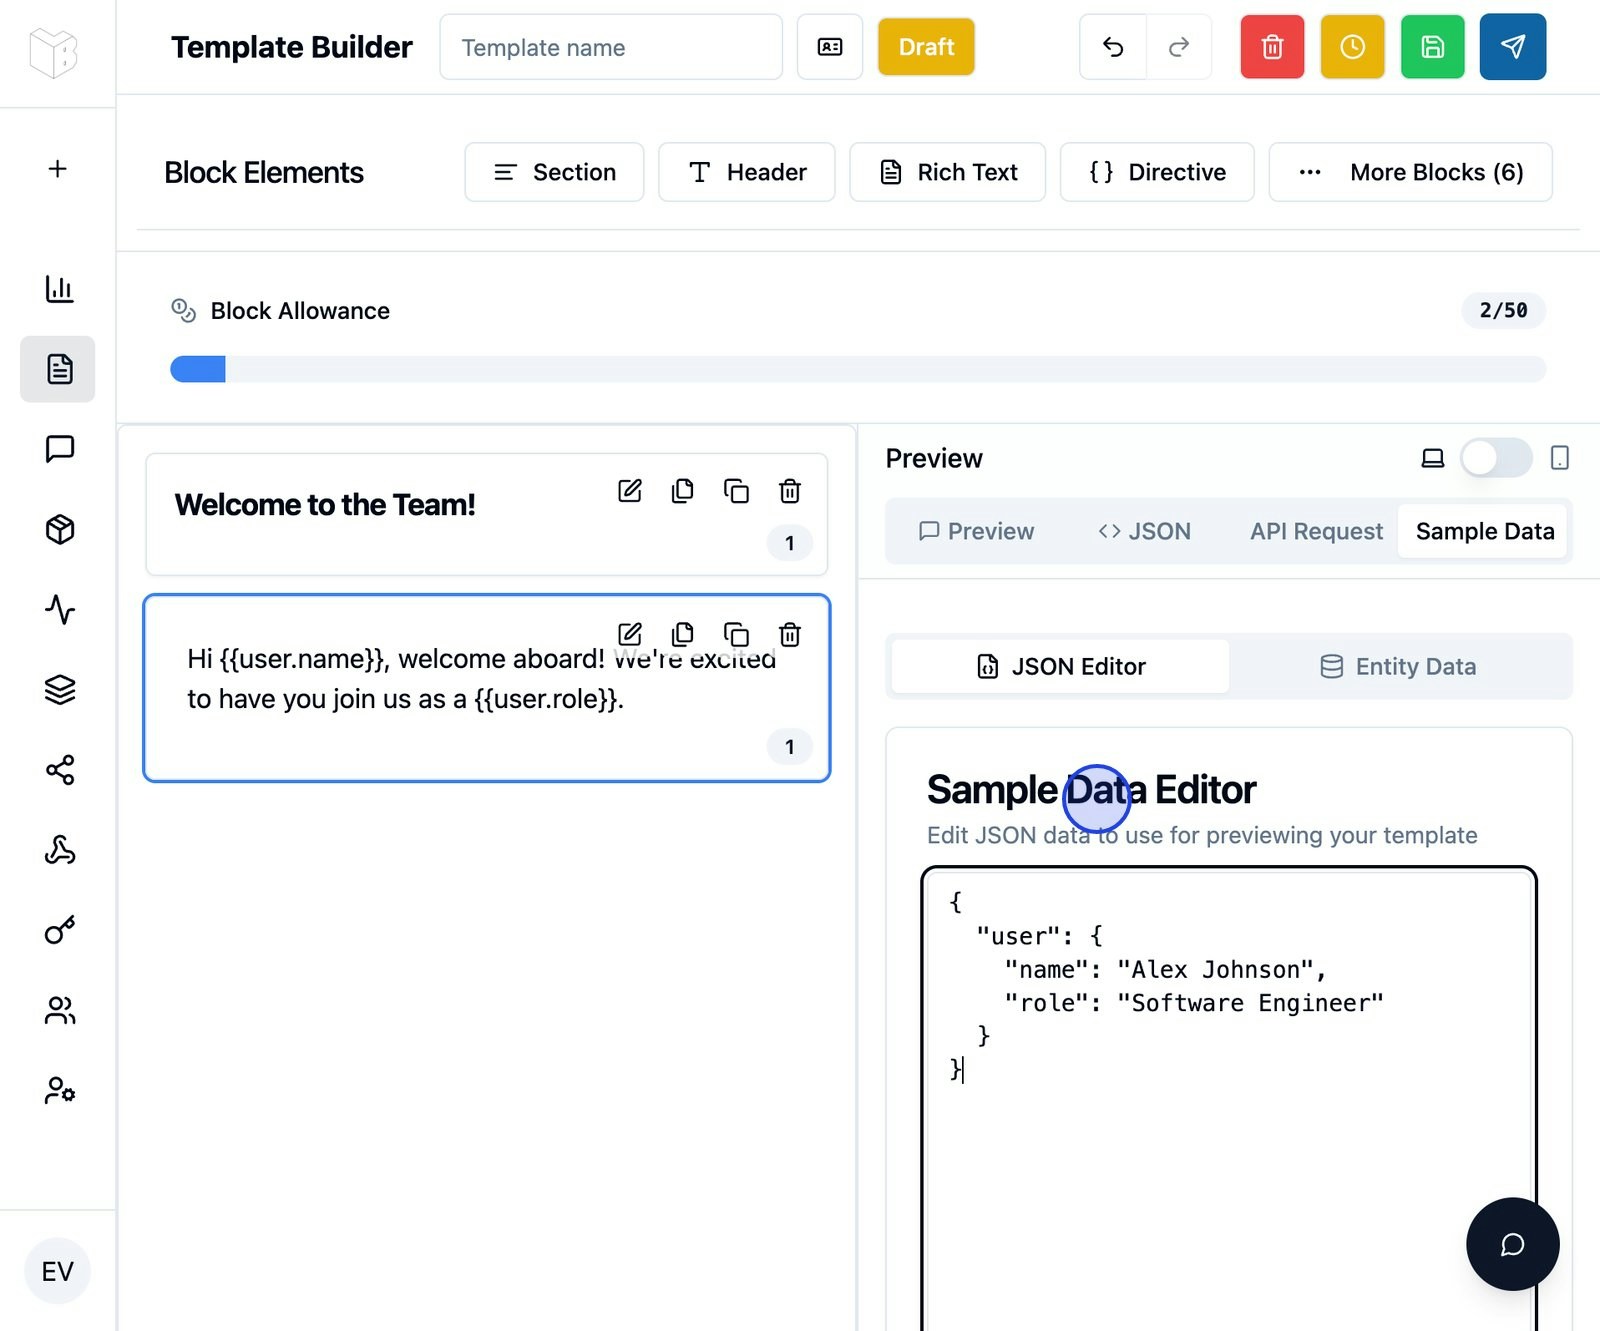
1. Click the **Sample Data** tab in the right panel
2. Switch to **JSON editor**
3. Add this sample data:

```json theme={null}
{
  "user": {
    "name": "Alex Johnson",
    "role": "Software Engineer"
  }
}
```

4. Click back to the **Preview** tab
<img src="https://mintcdn.com/lithoblocks/KGZFBT_KPY8H2VP2/images/quickstart-preview-rendered.png?fit=max&auto=format&n=KGZFBT_KPY8H2VP2&q=85&s=1719e6e41b0bfe961169e0236a5ecefc" alt="Preview showing rendered message" width="1600" height="1331" data-path="images/quickstart-preview-rendered.png" />

You should see your placeholders replaced with the sample data.
<Tip>
  Preview frequently to check how your message looks before sending.
</Tip>

## Step 5: Save and send

1. Click **Save** in the top right
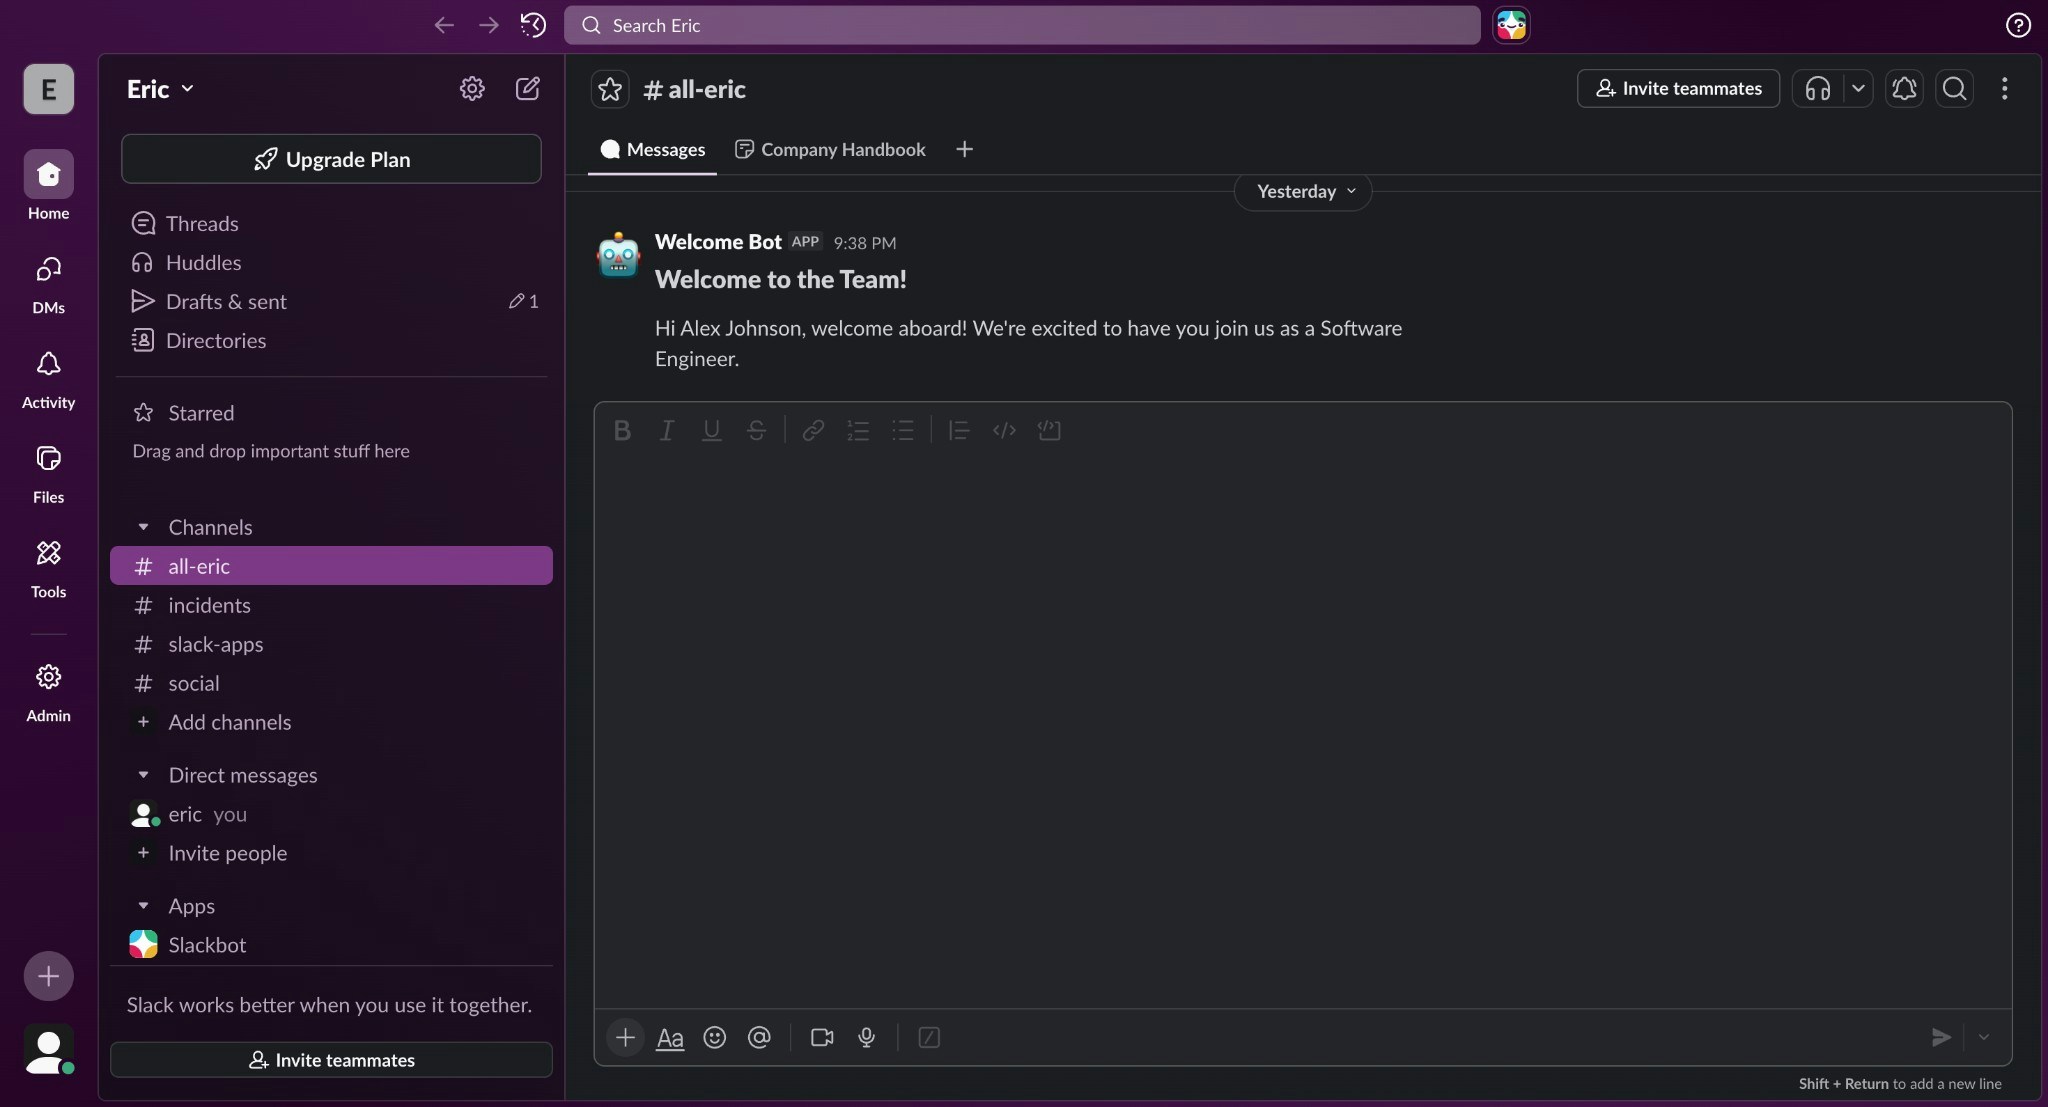
2. Click **Send to Slack**
3. Select a channel or user
4. The template is compiled with your sample data and sent
5. Check your Slack workspace for the message

<img src="https://mintcdn.com/lithoblocks/KGZFBT_KPY8H2VP2/images/quickstart-message-slack.png?fit=max&auto=format&n=KGZFBT_KPY8H2VP2&q=85&s=e750ec56d8f4e6574d4cea848c1bb541" alt="Message in Slack" width="2048" height="1107" data-path="images/quickstart-message-slack.png" />

## What you've built

You now have a template with:

* Static content (header)
* Dynamic placeholders (user name and role)
* An interactive button
* Sample data for testing

## Next steps

<CardGroup cols={2}>
  <Card title="Using placeholders" icon="code" href="/guides/templates-placeholders">
    Learn advanced placeholder syntax for nested objects and arrays.
  </Card>

  <Card title="Block types" icon="th-large" href="/guides/templates-blocks">
    Explore all available block types.
  </Card>

  <Card title="Interactive buttons" icon="hand-pointer" href="/guides/interactive-buttons">
    Make buttons trigger webhooks or open modals.
  </Card>

  <Card title="Button webhooks" icon="link" href="/guides/button-webhooks">
    Connect buttons to external systems.
  </Card>
</CardGroup>

## Common issues

<AccordionGroup>
  <Accordion title="Placeholders show as literal text (e.g. {{user.name}})">
    Make sure you have sample data in the Sample Data tab that matches your placeholder structure.
  </Accordion>

  <Accordion title="Template compilation failed">
    Check that all placeholders reference fields that exist in your sample data. Syntax errors (e.g. `{{user..name}}` with double dots) will also cause failures.
  </Accordion>

  <Accordion title="Button doesn't appear in Slack">
    Verify the Actions block is saved and the template compiled without errors.
  </Accordion>
</AccordionGroup>
