> ## Documentation Index
> Fetch the complete documentation index at: https://docs.lithoblocks.com/llms.txt
> Use this file to discover all available pages before exploring further.
# Interactive buttons
> Add buttons to Slack messages that trigger webhooks, message updates, or open modals.
Interactive buttons turn static messages into workflows. When a user clicks a button, you can send a webhook, update the message, or open a modal. This guide covers adding and configuring buttons.
## Prerequisites
* Understanding of [Block types](/guides/templates-blocks)
* Completed [Quickstart](/quickstart)
## Add an Actions block
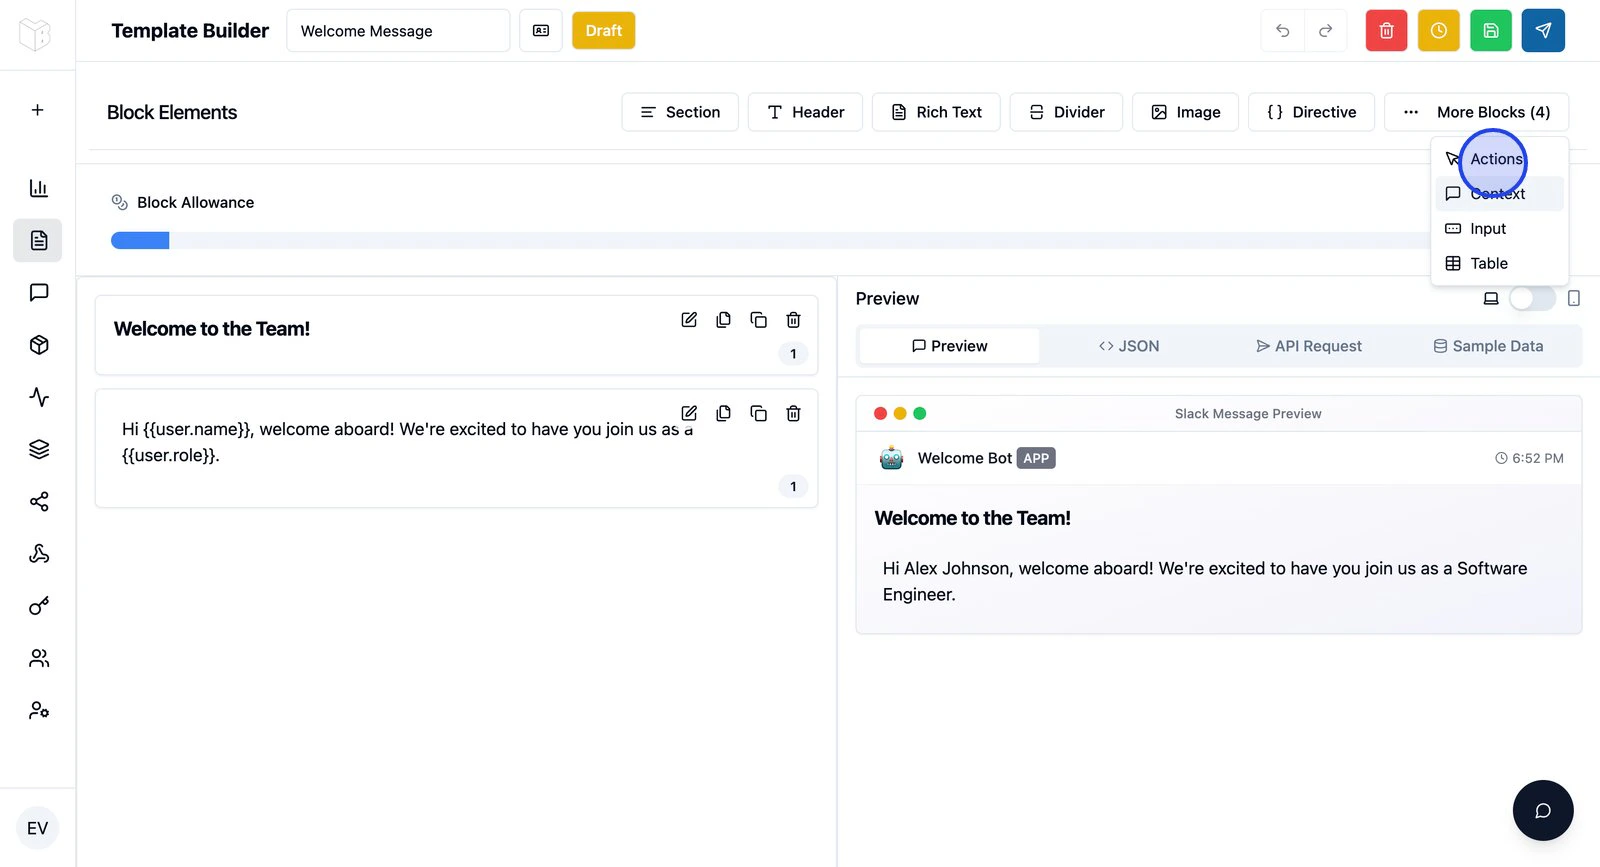
1. In the Template Builder, find **Actions** in the Block Toolbox
2. Click to add an Actions block
3. Configure the default button (or add more — up to 5 per block)
 ## Button configuration
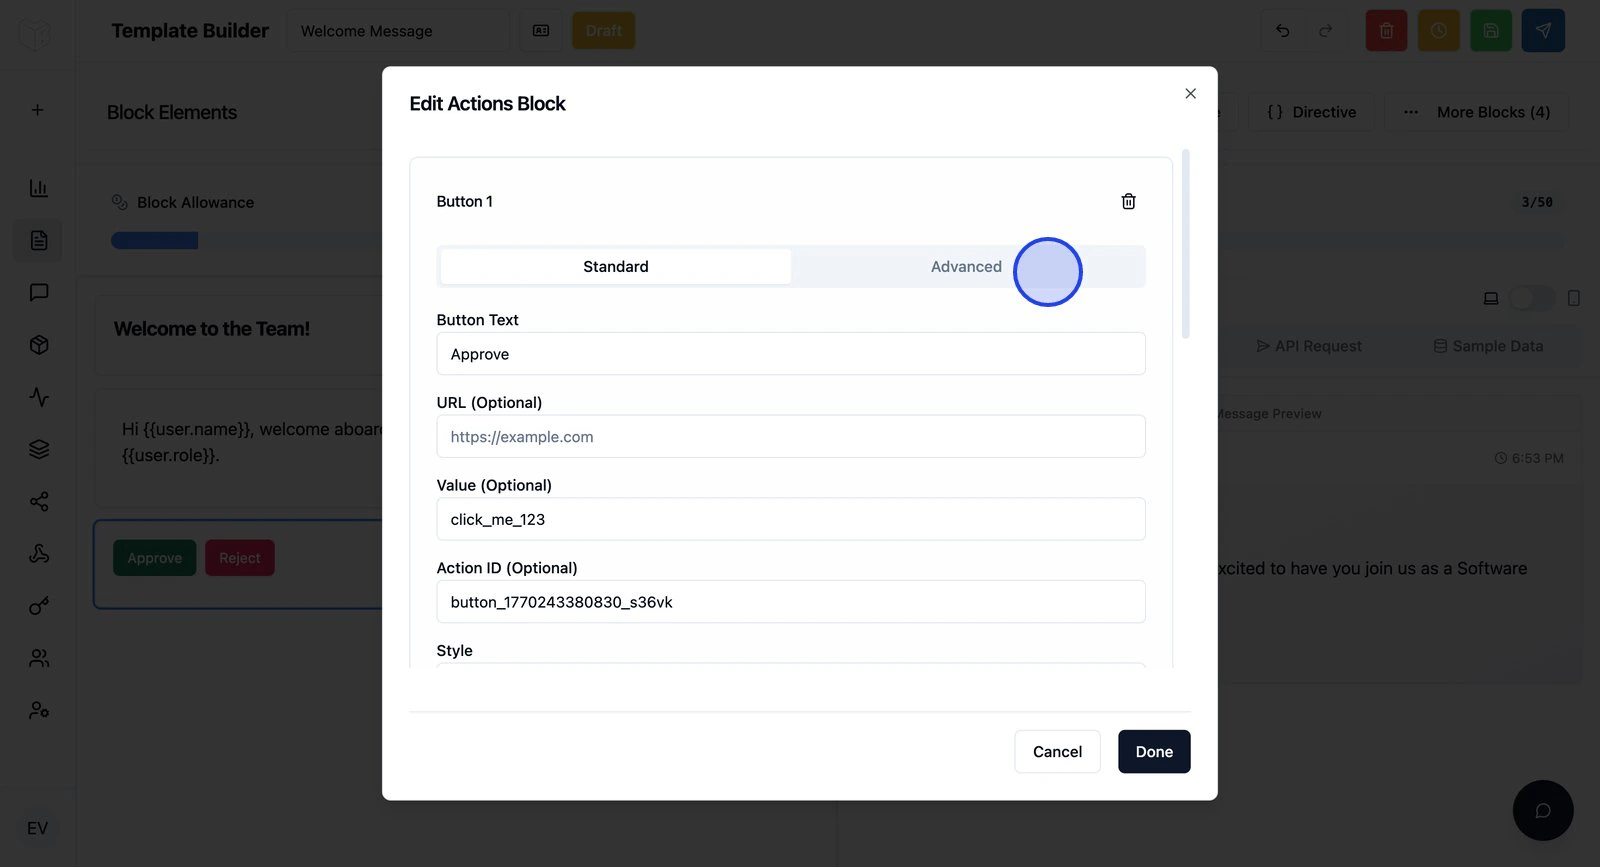
Each button needs:
| Field | Required | Description |
| ------------- | -------- | ------------------------------------------------------ |
| **Label** | Yes | Text on the button (e.g. "Approve", "View Details") |
| **Action ID** | Yes | Unique identifier for routing (e.g. `approve_request`) |
| **Style** | No | Primary (green), Danger (red), or Default (gray) |
| **Value** | No | Data passed when clicked (e.g. `{{request.id}}`) |
## Button configuration
Each button needs:
| Field | Required | Description |
| ------------- | -------- | ------------------------------------------------------ |
| **Label** | Yes | Text on the button (e.g. "Approve", "View Details") |
| **Action ID** | Yes | Unique identifier for routing (e.g. `approve_request`) |
| **Style** | No | Primary (green), Danger (red), or Default (gray) |
| **Value** | No | Data passed when clicked (e.g. `{{request.id}}`) |
 Use descriptive action IDs and short, action-oriented labels. Keep action IDs unique across the template.
## Example: Approval workflow
**Button 1 — Approve:**
* Label: `✓ Approve`
* Action ID: `approve_request`
* Style: Primary
* Value: `{{request.id}}`
**Button 2 — Reject:**
* Label: `✗ Reject`
* Action ID: `reject_request`
* Style: Danger
* Value: `{{request.id}}`
## What happens when a button is clicked
You can configure each button to:
1. **Send a webhook** — HTTP request to your API (see [Button webhooks](/guides/button-webhooks))
2. **Update the message** — Replace or append content (see [Message updates](/guides/button-message-updates))
3. **Open a modal** — Collect more input (see [Modals](/guides/modals-basics))
Configure the action in the button settings: **Add Action** → choose Webhook, Message Update, or Modal.
## Next steps
Send HTTP requests when buttons are clicked.
Update the message after a click.
Open forms from buttons.
Use descriptive action IDs and short, action-oriented labels. Keep action IDs unique across the template.
## Example: Approval workflow
**Button 1 — Approve:**
* Label: `✓ Approve`
* Action ID: `approve_request`
* Style: Primary
* Value: `{{request.id}}`
**Button 2 — Reject:**
* Label: `✗ Reject`
* Action ID: `reject_request`
* Style: Danger
* Value: `{{request.id}}`
## What happens when a button is clicked
You can configure each button to:
1. **Send a webhook** — HTTP request to your API (see [Button webhooks](/guides/button-webhooks))
2. **Update the message** — Replace or append content (see [Message updates](/guides/button-message-updates))
3. **Open a modal** — Collect more input (see [Modals](/guides/modals-basics))
Configure the action in the button settings: **Add Action** → choose Webhook, Message Update, or Modal.
## Next steps
Send HTTP requests when buttons are clicked.
Update the message after a click.
Open forms from buttons.